SEO
SaaS SEO Explained: How Important is SEO in a SaaS Business?
Discover why SEO is a growth engine for SaaS businesses. Learn how it evolves through different growth stages and its key pillars of success.


Khrystian Keu
When trying to build a world-class SaaS SEO strategy, having an up-to-date, reliable source of data on your site’s performance is essential, and Google Search Console is a great resource for just this.
With Google Search Console set up, you’re able to simply google a keyword for which you are ranking and immediately see your clicks, impressions, and average position for that keyword and how it has been performing recently according to these metrics. It also has the benefit of integrating with tools like SEMrush to enrich the data and metrics provided and give you a better understanding of your SEO standing.
Google Search Console is a powerful tool when set up and managed properly and should be a part of any content or SEO-focused marketers toolbelt. Here we’ll walk through the essential steps of how to set up Google Search Console.
Already set up with Search Console and are just looking to start a new record? Skip down to Step 3.
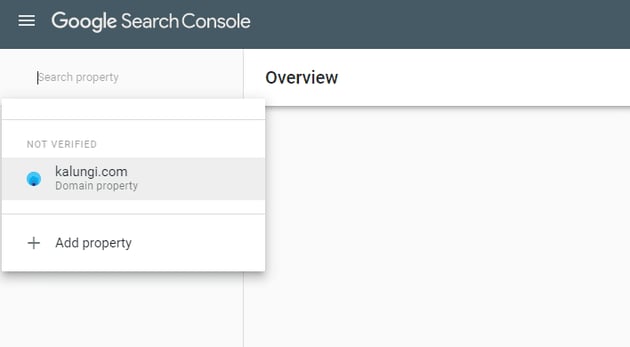
When you reach the Search Console homepage, hit the “Start now” button. Head to the top left menu, wherein you can search through your existing properties, and click “Add property.” This will take you to a few different adding and verification methods.
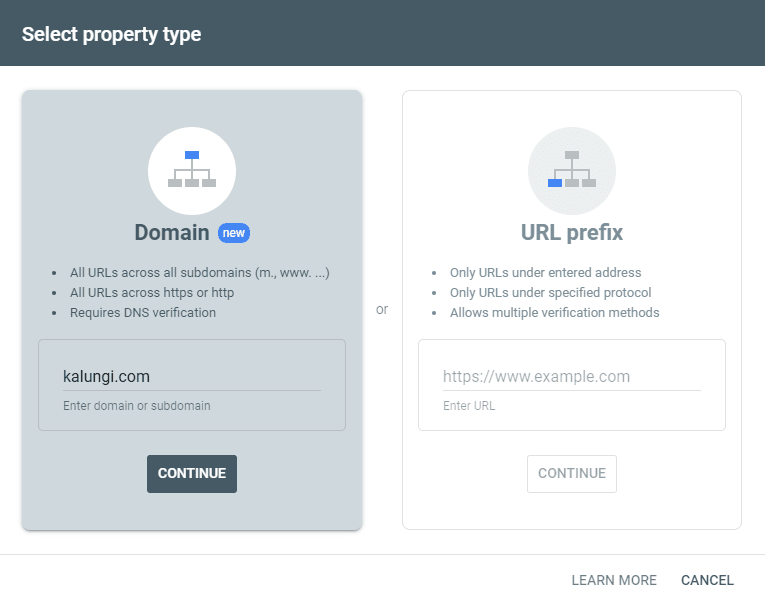
When selecting a property, you are given the choice between adding your domain or adding a URL prefix. The difference between the two lies in how much coverage of your site's Search Console will have. Using the URL prefix option might seem tempting since the only setup needed will be to access the website or specific pages you want to get information on and add an HTML tag. However, with this method, you will have to add additional tags each time you want to look at an additional domain which you did not previously specify. Here is a simple example of which domains we would be getting information on if we tried to add a URL prefix to https://www.kalungi.com/blog:
The reason why the bottom two domains are not verified, and we are thus not getting any information on, is that when using the URL prefix method you have to add a tag for each protocol or subdomain that is different from the original. The first unverified example above is the HTTP version of our “verified” HTTPS domain. The second unverified example has an added subdomain (www.) compared to the original which has no leading subdomain.
Because of the limitations of the URL prefix method, moving forward we’ll be working with the ”Domain” option in the DNS domain verification section. This is the best option of the two in most scenarios as it will cover the entirety of your domain and include all the URLs across your subdomains and protocols, leaving you without the hassle of adding additional tags for each domain variation.
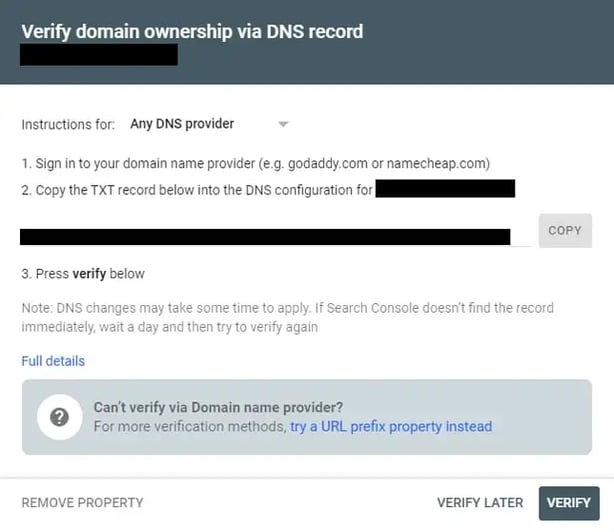
After entering your domain in the property type selection screen, you will be prompted to set up a TXT record in the DNS. Click on the ”COPY” button and head to your DNS provider to paste it into your DNS configuration. Once the record is added, hit the ”VERIFY” button.
Below is an example of inputting the value into GoDaddy
.webp?width=620&height=154&name=site%20txt%20record%20(1).webp)
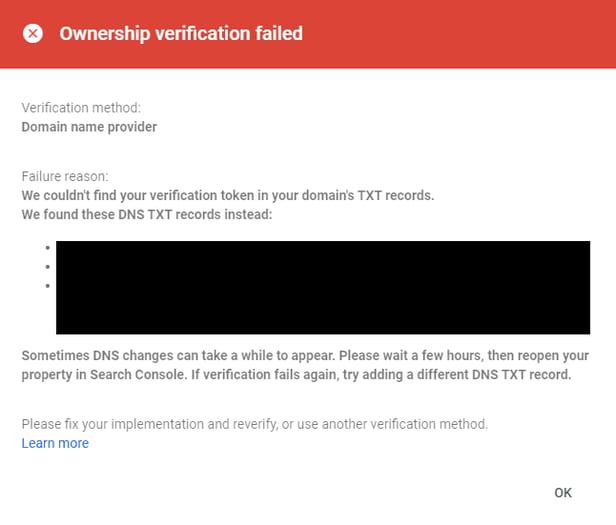
Sometimes DNS changes can take a while to completely register. If this is the case, wait for a couple of hours to a day and check the verification again. If the verification has failed again, double-check your TXT record to make sure you have inputted it correctly. Here is a link to Google’s help center if you are running into more problems related to this.
Now that the TXT records are in place, you have verified access to Search Console. With verified access granted, you are all set up to start getting powerful insights from Google, making your SEO analysis that much easier. One good place to get started is the ”Search results” tab under the ”Performance dropdown.” This section provides information on your domain with 4 useful metrics:
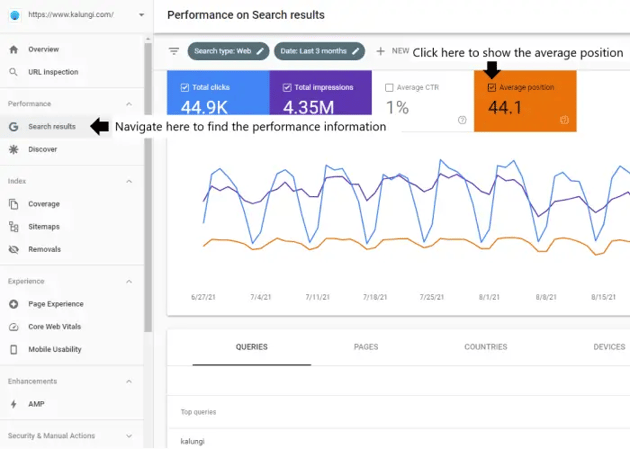
If you’d like to check on the performance of a specific page, a good way to focus on a single page is by following these steps:
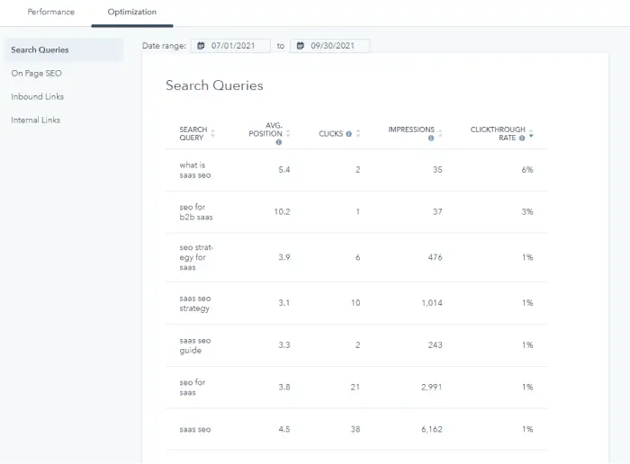
A note on integrations: Many systems such as SEMRush, Moz, and HubSpot can leverage the information Search Console provides. For HubSpot specifically, data can be ported right into their system to be viewed alongside a page’s other details through the Google Search Console integration.
Now you can teach all your friends and colleagues how to set up Google Search Console and the importance of each step. Using this tool in tandem with your tactical SEO efforts will lead to fantastic results and give one of the best keys to managing your SEO strategy!

Discover why SEO is a growth engine for SaaS businesses. Learn how it evolves through different growth stages and its key pillars of success.
Stalling at a revenue plateau? Stop forcing every marketing asset to generate leads. Learn why you must separate demand creation from demand capture.

Learn how to craft a winning competitive B2B SaaS positioning strategy using the Best, Better, Only framework and Seth Godin’s Positioning Grid.